
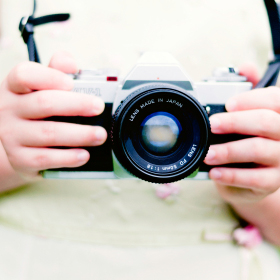
Photography 101. Finally learn what all those buttons mean.
It used to be, back when I photographed weddings, that I carried the largest camera in the room by at least several pounds. As I shot more and more, I started to notice guests toting a delicate clutch in one hand and a hefty digital single-lens reflex (DSLR) camera in the other. Now you can’t go to the park or a birthday party without spotting savvy moms and dads who’ve added full-sized digital cameras to our already sherpa-worthy collections of necessities.
DSLRs have become more attainable in the past few years, with prices just above those of high-quality pocket digital cameras. They offer loads more flexibility and control, and noticeably better photo quality.
As friends started researching upgrades from their small digicams, I became their go-to pro for shopping tips. Once the cameras arrived, they’d get small groups together and hire me to teach them how to get their cameras off of “green box mode” and really start taking control of their photos. Some of them had previous film camera experience and some were newbies, intimidated by just removing the lens cap.
And hey, no one wants to read the manual in all of its 4-point, single-spaced glory.
Regardless of the brand of DSLR you’ve wound up with, it’s going to take sharper, more saturated photos than your compact digital, and give you more of that professional-looking depth-of-field. And if you want it, it’s going to give you a LOT more control. While it’s nice to get lucky and take a gorgeous, vibrant shot, it’s more satisfying to know how you did it and to make it happen consistently, over and over. That is I mean, if you can get your kid to stay in the frame long enough for the shutter to release.
Start by playing with all those little icons on your camera’s control dial or in the menu on the back screen. No matter what make you’ve purchased, you’ll probably see icons resembling:
Silhouette of head in profile. This is portrait mode. This will help create depth of field (sharp foreground, blurry background) by setting your lens’ opening wide, letting in lots of light and making the range of focus more shallow. Don’t be afraid to get up close to your subjects, unless they’re in a cranky, food-throwing mood that day.
Mountain range. This is landscape mode. This will “close down” your lens opening, making the range of focus almost endless but also cutting out light, so you’ll want to use this during daylight hours or indoors with flash. This is the mode used most by the summer tourists perched on benches along Route 1A to capture scenic beach shots.
Tiny person in front of star. Here’s slow sync/night mode. This requires the flash to fire, but will slow the shutter speed down to capture more ambient light than in simple (green) mode, preventing flash wash-out. If you want to photograph a person in front of your Christmas tree, you’ll capture the lovely warm glow of the tree and still have plenty of light on your subject.
Footless person running. Your action mode will speed up the shutter to prevent blur on moving objects. Again, you’ll want to shoot in daylight or with the flash in this mode. Thankfully, kids’ sporting events don’t usually happen after sunset.
Once you’re familiar with these modes and their effects, you may become power mad and demand even more control. Then you’ll venture into the manual modes, marked on your camera’s dial with A (Av on Canon), S (Tv on Canon), and M.
A/Av lets you set your camera’s aperture, or the size of the hole inside your lens that lets light through, while your brilliant camera figures out a coordinating shutter speed. S/T mode does just the opposite, letting you choose a shutter speed while the camera brain calculates an appropriate aperture. M is pretty much home base when it comes to getting to know your DSLR. This gives you full control over all of your camera’s major settings, and requires a high level of comfort and familiarity with photography.
Experiment at your own pace on non-essential photos. (I have several hundred shots of my dogs peering suspiciously at me, and many more still lives of houseplants). Choose one object and one time of day (i.e. naptime) and photograph it in each mode. Have fun. You’ll find yourself becoming more comfortable and skilled until eventually, I’ll be completely out of a job.
About the author: Brenna Jennings is an experienced photographer living in Portsmouth with her husband, three spoiled dogs and almost-two-year-old daughter. Visit her professional photography site at http://www.notbrenda.com and check out her blog at http://notbrenda.com/blog for advice and musings on parenting by surprise.